Copy and paste the following script at the head of your site:
<script src="https://f13o.com/api/widget.js?key={YOUR_API_KEY}"></script>Replace {YOUR_API_KEY} with your API key. It will be available in your dashboard once you sign up.
Then add the following code to your body's site, where you want the widget to appear:
<div class="assistant-root">
	<assistant-widget></assistant-widget>
</div>
Do you have a WordPress site? Download our WordPress plugin from this link to easily add the assistant to your site. You will have all the following options available on the admin panel.
The <assistant-widget> component accepts the following props. All of them are optional, but it's recommended to fill them to provide a better user experience:
title |
Optional. The title of the page where the assistant operates. If not specified, the assistant uses the browser's page title. Maximum length: 255 characters. |
context |
Optional. Provides additional information about the page's topic, such as a summary, a list of keywords, or a product description. Maximum length: 1000 characters. |
banner |
Optional. The text displayed at the top of the assistant's widget, visible to users. It should explain how the assistant can assist them. |
trigger |
Optional. The label on the widget button that initiates the conversation. Maximum length: 255 characters. |
reward |
Optional. The incentive offered to users for providing their email, such as a discount code or a free item. Maximum length: 255 characters. |
dropzone |
Optional. The message shown in the dropzone area where users can upload files. Available only in the Professional plan. |
locale |
Optional. The language the assistant will use. Currently, only en (English, default) and es (Spanish) are supported. |
webhook |
Optional. The URL to which the user's email is sent upon submission. |
:fast-mode |
Optional. Set to true to activate fast mode, bypassing the assistant's questions and providing immediate response. false by default. |
:start-open |
Optional. Set to true to have the assistant open by default upon page load. false by default. |
Here's an example of how to use the component:
<assistant-widget
	title="How to Validate an Online Business"
	banner="<b>Validate Any Business Idea, In Seconds</b>. Instantly analyze and validate your business ideas. Receive a comprehensive business report in just minutes, not days!"
	trigger="Describe your business"
	reward="Receive a comprehensive business report"
	webhook="https://example.com/webhook"
></assistant-widget>Now that you have the assistant installed and configured, it's time to test it. Open your site and check if the assistant is visible. If it's not, check the console for any errors.
Following our example from step 2, the assistant should look like this (you can try it out!):
You can set up a custom webhook or Webhooks by Zapier to receive the user's email and integrate it with your favorite CRM or email marketing tool.
Here's an example of how to set up a webhook in Zapier:
- Go to Zapier and create a new Zap.
- Choose the "Webhooks by Zapier" app and select the "Catch Hook" trigger.
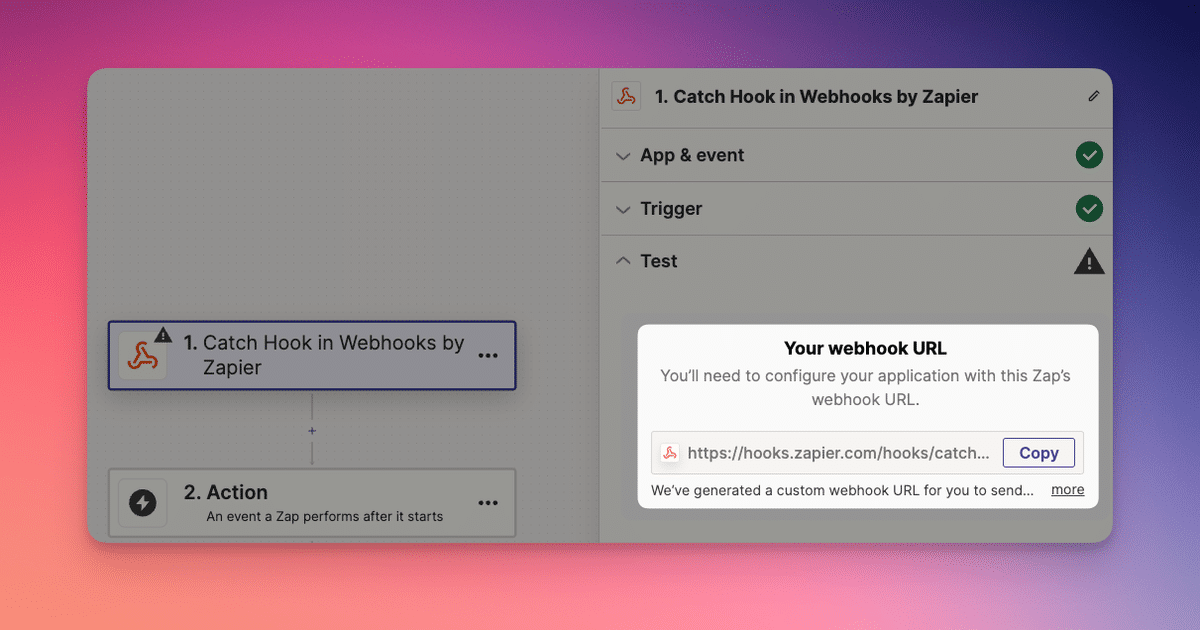
- Copy the webhook URL and paste it in the
webhookprop of the<assistant-widget>component. - Set up the action you want to perform with the user's email 🥳